Monday, January 6, 2014

List of iPhone Codes Found in CommCenter


As you probably know, CommCenter is a service that handles network connectivity on such iDevices as iPhone, iPad, iPod Touch. This is a .plist file which can be found in  /System/library/LaunchDaemons/com.apple.CommCenter.plist. By disabling it the user will lose all the cellular-related services and staring from iPhone OS 2.0 – loss of Wi-Fi networking until rebooting the device.

commcenter codes
By using some of the CommCenter commands listed below you can perform a wide range of interesting manipulations with your device such as baseband log dump, various operations with SMSC etc.
Before you start any manipulations with your device using CommCenter codes read those warnings carefully:
Warning 1: Probably you’ll need to change the prefix from the set of (*#, **, ##) to initiate a new log dump. The logs are not “tail” able, since this is a single dump, with no additional data written. It looks like, the logs always have the same size. Logfiles are stamped with the current date.
Warning 2: Stock iPhone with AT&T was used for this test. Maybe those error messages show debug features available only on specific debug cellular base-station (CONJECTURE only!)’
Here is the  table of CommCenter commands supported by iPhone using the phone keyboard.

Details

From CommCenter:
Any command can be preceded by *#, ** or ##.
*# for INTERROGATION.
** for SETUP.
## for CANCEL / DELETE.
*#5005*78283#This dumps a baseband log in /Library/Logs/Baseband/ – Warning 1
**5005*78283#This dumps a baseband log in /Library/Logs/Baseband/ – Warning 1
##5005*78283#This dumps a baseband log in /Library/Logs/Baseband/ – Warning 1
*#5005*62#“Error performing request – No Network Service” – Warning 2
*#5005*62255#“Error performing request – No Network Service” – Warning 2
*#5005*87223#“Error performing request – No Network Service” – Warning 2
*#5005*86#Displays the Voice Mail dial-in number.
**5005*86*VOICEMAIL#Sets the Voice Mail number to VOICEMAIL (international format).
##5005*86#Erases the Voice Mail number from phone.
*#5005*7672#Display the SMSC Setting.
**5005*7672*SMSCNUMBER#Sets the SMSC to SMSCNUMBER (international format).
##5005*7672#Erases the SMSC number from phone.
*#5005*22#“Error performing request – No Network Service” – Warning 2
**5005*22#Unknown. Displays “Please wait”; returns to dialpad – Warning 2
##5005*22#Unknown. Displays “Please wait”; returns to dialpad – Warning 2
*#5005*5264#This reads LANG and tells you the “actual language” (en).
*#5005#“Error performing request – No Network Service” – Warning 2
##5005*22*12345678#Function unknown, displays “please wait”…; power-off to exit.
#302#-
#303#-
#304#-
#305#-
#306#-
#307#is a call loop into the iphone, it makes a call to itself.
#5005*62255#   translates to something like MCALL/NCALL/OCAL.
#5005*87223#   translates to Trace.
“#31# number” to hide caller id. To call and not show your call number.
Interesting to note that the number codes correspond to the alphabets to spell out the service
Voicemail: #5005*86# => 86 = VM
SMSC: #5005*7672# => 7672 = SMSC
The code for vm number is the vm routing number which you need to get from your service provider does work on the iPhone 4. (I work tech for a cell phone company and we use it all the time)

Some other codes that can be entered just using iDevice’s keypad:

iphone Field test
*3001#12345#* and tap Call  - Field test. This mode shows lots of advanced network information including info about cell site and more.
*#06# – IMEI number (International Mobile Equipment Identity). This code is usual for many other phones.
*#21# – Shows all the call forwarding settings set on your iPhone.
*#43# – Shows you if call waiting for various parts of your iPhone are either enabled or disabled.
*#30# – Shows you if you have the call presentation (to see who is calling you) setting enabled or disabled.
*#33# – Displays call barring settings for your iPhone, and whether they are enabled or disabled.

How to do SMS Spoofing using iPhone 4 and SendRawPDU Script by Pod2g


Few days ago I wrote you news that famous French hacker Pod2g found exploit in iPhone SMS security which allowed one people to send text messages to others but with wrong address.
To perform this you need to use CLI tool to send raw SMS PDU data to the iPhone 4 baseband. This tool is called sendrawpdu and you can find info about it here because in this article we will talk how to make it works on your iPhone 4.
First you need to compile sendrawpdu file on your iPhone 4 and only then to use it. But before we start you need to comply with the requirements given below:
Note: We are not responsible for those who will use this spoofing method in illegal way. We just sharing our first time experience of using this tool.
How to spoof SMS on iPhone 4
Requirements
  • Mac OS X 10.6 and higher.
  • Xcode 4.0 and higher.
  • iosopendev package (you can use this link to download it).
If you don’t have MacOS X and couldn’t compile this script by your own then use download link bellow.
Download Compiled SendRawPDU for iPhone 4 / 4s (link updated)
Now please upload sendrawpdu file to /usr/bin/ directory so the final location would be /usr/bin/sendrawpdu

How to Use Sendrawpdu to Send Spoofing SMS

Note: You must be acquainted with Mobile Terminal or SSH conection between computer and your iPhone.
Step one: open terminal and navigate to the folder where sendrawpdu is located. Then type the next command:
sudo chmod +x sendrawpdu
Now we are ready to lanch this CLI tool and try to send some data.
Step two: Launch this script by typping
./sendrawpdu YOUR PDU DATA
Step three: What PDU data should I put there and what does it looks like? To answer this questions you have to learn some info about SMS technology.
SMS (Short Message Service) is specified by the ETSI (standards GSM 03.401 and 03.382 ). It can contain up to 160 characters, where each character is written according to the 7-bits GSM default alphabet (7 bits default table)

SMS also contains some meta-data

  • Info about the senders ( Service center number, sender number)
  • Protocol information (Protocol identifier, Data coding scheme)
  • Timestamp
There are 2 ways to receive and send SMS messages a, PDU (protocol discription unit) and Text mode. So as you see sendrawpdu is designed to use PDU data for sending text messages. PDU format can be used on any encoding and it is all in the form of hexa-decimal octets or decimal semi-octets.
Here is the example of “How are you” message in PDU:
069110090000F111000C918390831470380000AA0CC8F71D14969741F977FD07
You need Open Source decoder/encoder for PDU so you can easily decode text string into PDU data format.
Update: If you are on Windows PC you can use PDUSpy software and my guide to generate your  RAW PDU data
So the final command for sending spoofing text messages would be like:
./sendrawpdu 069110090000F111000C918390831470380000AA0CC8F71D14969741F977FD07
You should see your iPhone 4 baseband has been sending PDU RAW Data:
AT
OK
AT+CMGF=0
OK
AT+CMGS=31
And that’s it. Now you know how to do this. But I advice you to find out if you break the law of your country sending spoofing text messages. It can be illegal. We are not responsible for your following actions.
Update: If you have errors with Send Raw PDU then go and fix it.
Also you can read the article on how to prevent sending spoof SMS. This advice came straight from Apple company. If there are some questions feel free to use comment section below to put them all. Also don’t forget to share this essential info using share buttons bellow.

How to send AT Commands to iPhone 4


This article will help to figure out how to send AT Commands to iPhone 4. The commands will be sent via iPhone shell. We’ve already published the list of AT commands and the tools that will help you to send that commands. In this tutorial we will use minicon (you can install it from Cydia) or just follow the link above to review the tools which can be used for communicating with your iPhone’s baseband.
pass-the-at-commands-to-iphone-4
To install minicom from Cydia you should do next things. After installing the package itself check if the folder /usr/etc exists. Connect to your iPhone through SSH and then type in:
minicom -s
after that continue setting up the ports and all the other things as usual. If you’re not sure how to do that or just want to remind yourself of something within the installation process – read this post to get the detailed instructions on how to install and configure minicom.
In /dev folder you can find interfaces like this:
 iPhone4:/dev root# ls /dev   aes_0 io8logmt tty.highland-park   bpf0 klog tty.iap   bpf1 mux.spi-baseband tty.umts   bpf2 null ttyp0   bpf3 pf ttyp1   btreset ptmx ttyp2   btwake ptyp0 ttyp3   console ptyp1 ttyp4   cu.bluetooth ptyp2 ttyp5   cu.debug ptyp3 ttyp6   cu.gas-gauge ptyp4 ttyp7   cu.gps ptyp5 ttyp8   cu.highland-park ptyp6 ttyp9   cu.iap ptyp7 ttypa   cu.umts ptyp8 ttypb   disk0 ptyp9 ttypc   disk0s1 ptypa ttypd   disk0s2 ptypb ttype   disk0s2s1 ptypc ttypf   dlci.spi-baseband.call ptypd ttys000   dlci.spi-baseband.chatty ptype uart.bluetooth   dlci.spi-baseband.cl1 ptypf uart.debug   dlci.spi-baseband.extra_0 random uart.gas-gauge   dlci.spi-baseband.iq rdisk0 uart.gps   dlci.spi-baseband.low rdisk0s1 uart.highland-park   dlci.spi-baseband.pdp_0 rdisk0s2 uart.iap   dlci.spi-baseband.pdp_1 rdisk0s2s1 uart.umts   dlci.spi-baseband.pdp_2 sha1_0 urandom   dlci.spi-baseband.pdp_3 tty vn0   dlci.spi-baseband.pdp_ctl tty.bluetooth vn1   dlci.spi-baseband.reg tty.debug zero   dlci.spi-baseband.sms tty.gas-gauge   io8log tty.gps
The /dev/dlci.spi-baseband.extra_0 worked fine for me but I can’t guarantee it will do the same for you.
Setup minicom properly to make it work:
 iPhone4:/dev root# minicom -s
after that select “Serial port setup” and press A and edit the line of the serial device (for me was that):
 A - Serial Device : /dev/dlci.spi-baseband.extra_0
Type esc and “Save setup as dfl”, then exit and type:
 iPhone4:/dev root# minicom -w
for connecting to the device.
Afterwards type in AT. If you get an “OK” response – everything should now work like a charm If not – double check the ”serial port setup” settings.
To make a call to the 3931111100 number simply type:
 atd3931111100;
for hanging up:
 ath
To obtain the sim serial number (iccid number) type:
 at+ccid
To get your phone’s imei number put in:
 at+cgsn
That’s basically all the steps you need to make to send AT Commands to iPhone 4. Looks pretty easy if you know at least what minicom and SSH is, right? If you need to connect to iPhone 5 BB use this guide. Let us know how it worked for you in the comment section under the article.

How To Hack iPhone baseband Using BBTool, DLOADTool, DBLTool and iOSUSBEnum


While one hackers working on iOS jalbreaking the others on baseband hacking. Now it is possible to hack iPhone baseband of the newer models. There are four tools that were written by P0sixninja to hack only with Qualcomm hardware iPhone 5, 4S and 4 (CDMA). There is a possibility to access iPhone 5 baseband using Minicom and Signal 2 app but here is something different.You can use BBTool, DLOADTool, DBLTool and iOSUSBEnum to boot up Qualcomm baseband’s files which are related to QHSDLOAD protocol (Qualcomm DLOAD protocol). These program will allow you to open iPhone bb giving the possibility to find exploits and try to use them to unlock iPhone 5 and other models. It can be used for raw communication with the baseband like fuzzing. Fuzzing is one of the easiest and most efficient ways to find vulnerabilities.
  • iOSUSBEnum (Utility to enumerate USB (HSIC) devices on iOS)
  • BBTool (Tool for communicating with AppleBaseband Kext on iOS)
  • DBLTool (Tool for communicating with Sahara protocol (DBL) on iPhone4 CDMA, iPhone4s, and iPhone5 (Apple SAH Protocol)
  • DLOADTool (Tool for communicating with QHSDLOAD protocol on iPhone4 CDMA, iPhone4s, and iPhone5 (Qualcomm DLOAD protocol)
how to hack iphone baseband Important Notes

How to Boot Up iPhone baseband Files Using Hacking Tools

Step 1. Download CommCenter to use BBTool, DLOADTool, DBLTool and iOSUSBEnum. To perform this you need to SSH your device and add this command:
launchctl unload /System/Library/LaunchDaemons/com.apple.CommCenter.plist
Step 2. Make Qualcomm baseband to be not shown in the device list – type:
iosusbenum
Step 3. Now you need to access iPhone filesystem, because bb hasn’t internal flash to keep a firmware. Unzip these firmware files and access file system using the command below:
cd /usr/local/standalone/firmware/Baseband/Trek  unzip Trek-personalized.zip
If your device is still running iOS 5.x, just type the following:
cd /usr/standalone/firmware/Trek  unzip Trek-personalized.zip
There are will be various files but bbticket.der, dbl.mbn, osbl.mbn, and amss.mbn files you need.
Step 3.1. Now use BBTool to put iPhone in DLOAD mode (DFU mode). Enter the command below:
bbtool enter-dload
To make sure that your device entered DLOAD mode you will see the following using iosusbenum command:
Device Name: QHSUSB_DLOAD Vendor ID: 0x5c6 Product ID: 0×9008 Version: 0×0 Location: 0×1200000 Configuration: 0 Length: 0×9 Descriptor Type: 0×2 Total Length: 0×20 Num Interfaces: 0×1 Configuration Value: 0×1 …………………………………….. Endpoint Length: 0×7 Descriptor Type: 0×5 Endpoint Address: 0×1 Attributes: 0×2 Transfer Type: Bulk Max Packet Size: 0×200 Interval: 0×0
Step 4. Now you need DLOADTool to boot iPhone into DBL (SAH) mode. to make it work just enter the following:
dloadtool -f /usr/local/standalone/firmware/Baseband/Trek/dbl.mbn
After receiving and sending a bunch of messages you can use iosusbenum to verify if your device is in the DBLmode and get something like this:
Device Name: Qualcomm CDMA Technologies MSM Vendor ID: 0x5c6 Product ID: 0x900e Version: 0×0 Location: 0×1200000 Configuration: 0 Length: 0×9 Descriptor Type: 0×2 Total Length: 0×20 Num Interfaces: 0×1 Configuration Value: 0×1 …………………………………….. Endpoint Length: 0×7 Descriptor Type: 0×5 Endpoint Address: 0×1 Attributes: 0×2 Transfer Type: Bulk Max Packet Size: 0×200 Interval: 0×20
Step 5. You can also use DBLOADTool to enter the normal operating mode after DBL mode. As you may guess you will need to step to bbticket, osbl, and amss into DBLTool entering the following command to hack iPhone baseband:
dbltool -b /usr/local/standalone/firmware/Baseband/Trek/bbticket.der -o /usr/local/standalone/firmware/Baseband/Trek/osbl.mbn -a /usr/local/standalone/firmware/Baseband/Trek/amss.mbn
Step 6. Wait up to 30 seconds because AMSS loading may take some time. To see if the iPhone baseband was booted up, you can use iosusbenum command without CommCenter been loaded. The command output should be like these below:
Device Name: Qualcomm CDMA Technologies MSM Vendor ID: 0x5c6 Product ID: 0×9001 Version: 0×0 Location: 0×1200000 Configuration: 0 Length: 0×9 Descriptor Type: 0×2 Total Length: 0×118 Num Interfaces: 0xd Configuration Value: 0×1 ……………………………. ……………………………. ……………………………. ……………………………. Endpoint Length: 0×7 Descriptor Type: 0×5 Endpoint Address: 0×8 Attributes: 0×2 Transfer Type: Bulk Max Packet Size: 0×200 Interval: 0×20
Step 7. To reset the iPhone baseband to its original settings use command:
bbtool reset
Seeing this bunch of information you can be sure that you have just hacked iPhone baseband and fully boot it up even without CommCenter. The last thing left is to send commands to iPhone baseband using DIAGTool and QMITool and explore the modem firmware and filesystem in general. Use comment section below to share your experience with booting up iPhone bb.
Source: iPhone Wiki. Via: P0sixninja GitHub

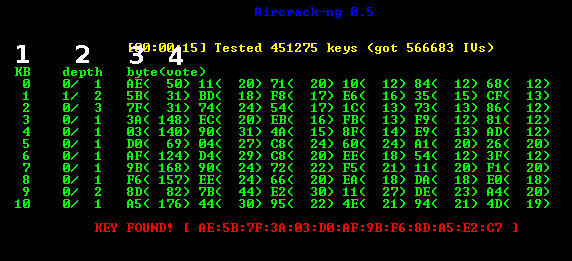
Hack WiFi Passwords for Free Downloading Aircrack on iPhone and iPod Touch

Hack WiFi Passwords for Free Downloading Aircrack on iPhone and iPod Touch


Download Aircrack, really useful and interesting Cydia tweak for jailbroken iDevice, and hack WiFi passwords for free. Just use terminal and special command to launch Aircrack on iPhone 4, 5 and iPod Touch.
If you like using this app you can also try Pirni Pro to sniff network traffic usernames, passwords and data traffic over WiFi network and then filter them.
As for Aircrack, the process is very easy and may take only 2 minutes. Also you need to have Terminal through WinSCP on Windows PC and Mobile Terminal on iPhone.

The latest version of this Cydia tweak supports iOS 6 / 6.1.2 but only with one condition. If your device is jailbroken. So if you still use at least iOS 6.1.2 you can use evasi0n to jailbreak iGadget and update Cydia packages.

How to Use Aircrack To Hack WiFi for Free

Step 1. Open Cydia and install Aircrack adding this repo:
ihackmyi.com/cydia
or other working repo from which you can install this app.

Step 2.  Now just go to your computer and make sure that you set permission to 777 for every file.
Step 3. Launch WinSCP and open Terminal from /var/
Step 4. After that just enter the following:
sysctl -w security.mac.proc_enforce=0 security.mac.vnode_enforce=0 /aircrack
Step 5. Return to your device and open Mobile Terminal. If you don’t have it on your iPhone just launch Cydia and go to Search. Find Mobile Terminal and install it.
Step 6. After installation, launch Terminal and login using root SSH password:
  • type user name: su
  • type default password: alpine
If you like to change iPhone root SSH password you can do it without problems.

Step 7. After you enter the password just type the command below to activate Aircrack on iPhone. After adding the code just wait for the end of the process. As I said it might take near 2 minutes:
/var/aircrack/aircrack-ng -a 1 /var/aircrack/touch.ivs
Where /var/aircrack/aircrack-ng the command to open the file terminal, -a 1 is the wep, the type of encryption and /var/aircrack/touch.ivs is the place where all packets will be saved in the end.
touch.ivs is a file which will contain all hacked WiFi passwords. You can open it using iFile and any recorder that support that type of file. Also you can upload that file on the computer and work with it there.

Sunday, January 5, 2014

How to Increase Youtube Buffer Speed Easily


We know that youtube is the best online video sharing website and the most popular website in the world. We can see and download videos from here easily because all types of videos found here.
Computer Tips gives important tips for people who view youtube videos regularly. In the time of viewing youtube videos, couldn’t see videos clearly for low internet connection. It depends on buffer speed. For low internet connections the buffering speed decrease that disturb to see youtube videos. To overcome this problem has a trick that increases buffer speed easily. Follow the bellow instructions.
Open firefox browser and install “Grease monkey” addon and restart firefox.

Again download/install "Buffer Script" from here.
 Restart firefox again and enjoy high speed youtube videos.

How to increase your computer speed


DiskMax is the powerful disc clean up and windows performance optimizer application. Download the software from here. After installing the software see how fast your computer. Every application will be open very fast. Computer tips give more important information about DiscMax.


  1. Automatic recycle bin, installation remnants, debagging information clean up.
  2. Every user history, temp, temporary interface, cookies, recent files, explorer thumbnail cash and windows error logos clean up.
  3. Windows cash, unused ligase cursor, internet logs, help center cash, repairing information, DLL cash, temporary file and windows update roll back files clean up.
  4. Using deep scanning it can remove  log, old, prv, chk, swp, bak, gid, wbk, tmp and dmp files.

How to Block Unusual Comments from Facebook Fan Page


If you want to block unusual comments from your fan page follow the bellow the instruction -

Step : 1
Open your Facebook Page and go to Edit Page > Manage Permission,
Like as ……………
Step : 2
Now Mange Permission > Modaration Blocklist
Which word you want to block, write into the box.
Like as …… www, bad, like, post
Profanity Blocklist = Strong
Finally save your page and go back. From now no one can see the block word without page admin.

How to Delete Cookies from firefox browser

Cookies are stored on your computer by websites you visit and contain information such as login status or site preferences. Cookies are deleted to remove website information from any browser (Mozilla Firefox, Google Chrome, Safari, Internet Explorer, etc). This article describes how to delete cookies in Firefox.

To delete cookies for one site:
  1. At the top of the Firefox window, click on the "Firefox Button" (Tools Menu for Win XP) and then click "Options"
  2. Select the "Privacy panel".
  3. Set Firefox will: to "Use custom settings for history". Or click "remove individual cookies"
   4. Click "Show Cookies..."  The Cookies window will appear. 
  5. In the Search: field, type the name of the site whose cookies you want to remove. The cookies that match your search will be displayed. 
  6. Select the cookie(s) in the list to remove and click Remove Cookie.
 7. Select the first cookie and press Shift+End to select all the cookies in the list. 
 8. Click "Close" to close the Cookies window. 
  

To delete all cookies :
  1. At the top of the Firefox window, click on the Firefox button, go over to the History menu (click on the Tools menu in Windows XP) and select Clear Recent History....
  2. Set Time range to clear to Everything.
  3. Click on the arrow next to Details to expand the list of history items.
  4. Select Cookies and make sure that other items you want to keep are not selected.
  5. Click Clear Now to clear the cookies and close the Clear Recent History window.

How to Write Your Name on PC Taskbar's Clock

Computer Tips gives you a better and interesting tips for you. If you want to display your name on your computer taskbar besides on clock. Follow the bellow instruction -

1. First, click on the taskbar clock and go toChange date and time settings…”  

2. A new dialbox window will open then click "Change date and time".

3. Again a new dialbox window will open then click “Change calendar settings”.

4. From “Customize format” dialbox click “Time tab”.
 5. Now Click AM Symbol and PM Symbol box to write your name beside it. Then click apply and ok of all the three previously opened dialbox.

N.B: You can do this work by going to Control panel.
Control panel > Region and Language > Additional settings > time Tab > AM & PM symbol.

Windows 8 Professional RETAIL (x86/x64) + 3 Activators | 5.79 GB

Windows 8 is the current release of the Windows operating system, produced by Microsoft for use on personal computers, including home and business desktops, laptops, tablets, and home theater PCs. Development of Windows 8 started before the release of its predecessor in 2009. Its existence was first announced at CES 2011, and followed by the release of three pre-release versions from September 2011 to May 2012. The operating system was released to manufacturing on August 1, 2012, and was released for general availability on October 26, 2012.

Windows 8 introduces significant changes to the operating system’s platform, primarily focused towards improving its user experience on mobile devices such as tablets to rival other mobile operating systems (such as Android and iOS),[4] taking advantage of new and emerging technologies (such as USB 3.0, UEFI firmware, near field communications, cloud computing, and the low-power ARM architecture), new security features (such as malware filtering, built-in antivirus software, and support for secure boot, a controversial UEFI feature which requires operating systems to be digitally signed to prevent malware from infecting the boot process), along with other changes and performance improvements.

Windows 8 also introduces a new shell and user interface based on Microsoft’s “Metro” design language, featuring a new Start screen with a grid of dynamically updating tiles to represent applications, a new app platform with an emphasis on touchscreen input, the new Windows Store to obtain and purchase applications for the system, and the ability to synchronize programs and settings between multiple devices.

Minimum hardware requirements for Windows 8
Architecture IA-32 (32-bit) x86-64 (64-bit)
Processor 1 GHz (with PAE, NX and SSE2 support)[81]
Memory (RAM) 1 GB 2 GB
Graphics Card DirectX 9 graphics device with WDDM 1.0 or higher driver
Storage 16 GB 20 GB

Installation:
1. Start the setup.exe
2. Use this key to get the setup started:
-NG4HW-VH26C-733KW-K6F98-J8CK4
3. Let it install
4. Run one of the activators provided.

How to make a windows 8 bootable ISO file.


Computer Tips give you a tutorial which will learn how to make a bootable ISO file for windows 8. After burning ISO file on DVD it will be bootable and you can use this DVD for setup windows 8 easily.

1. First you need to download a small software named ESD-TO-ISO.zip from the bellow
link.
2. After finising the download extract the zip file.

3. Unblock the ESD-TO-ISO.EXE file and open the file right click on it and click run as administrator.

4. Now click yes(Windows 7 or 8) / continue (Vista)

5. Go
6. Click yes
7. It will make a ISO file
8. If you give "create (burn) a bootable DVD" then will make bootable otherwise give cancle.
9. Find the Upgrate ISO file from C: drive - C:\WIN8x64.iso
10. Finished

Now you can write this ISO file on DVD.

How to use a flash drive as a RAM

Two types of memory are used for windows work. One is physical memory and the other is virtual memory. Physical memory is called hard disk and virtual memory is also known as RAM/Random Access Memory.  In this tutorial we discussed how to use virtual memory using pen drive or flash drive.
Let’s go – For this we need at least 2GB flash drive. If 4GD it will be good.
First connect the flash drive to the computer.

  1. Go to the “properties” option by right clicking on “My Computer”.
  2. Go to the option - Advanced/Performance/Settings/Advanced /Change.

   3. Now select the flash drive from Drive (volume label) option menu.
   4. By selecting the “Custom Size” you can see the Initial size and Maximum size bland box.
    5. Write the memory size in that box that you want to use as a RAM.
    6. For windows need 5MB blank memory so keep 5MB memory for windows.
    7. Apply/OK and restart the computer.

Now your flash drive is work as a RAM.

How to Remove the Password from PDF files

How to Remove the Password from PDF files

In our daily life we are familiar on pdf files. Basically online books are pdf file format. Sometimes we need to copy the text from the pdf book but some of them are copy protected then we can not do this.
http://www.mediafire.com/download/2xpiretmwz4c8d4.rar
Many of them don't know that these files are password protected. So what can we do if the files are password protected?

Well, i am giving you a software with serial key named “Wondershare PDF Password Remover” which will help to remove the password from the pdf file. Software size is only 4.72MB. You can download from mediafire in this site.

Wondershare PDF Editor features:
Merge PDF files into a large single PDF document.
Split large PDF files to small ones for email.
Edit text, images, and watermark in PDF files.
Add, crop, extract and delete PDF pages.
Convert PDF to Word/Excel/PPT/RTF/EPUB, etc.

You can buy full version form this site only $34.95.

Friday, January 3, 2014

Iphone Tips: How To Add Your Favorite Contacts To iPhone’s Home Screen Without Jailbreaking

While the phone app on your iPhone lets you select favorite contacts from your contact list to easily call them, it can take three taps to finally end up on the calling screen. In this article, we tell you a trick by which you can call people you frequently contact right from your homescreen, without the need for a jailbreak.
To do this, you’ll have to first download iPhone Configuration Utility, a software developed by Apple, targeted for enterprise device management. You can download and install the Windows version from here, and the Mac version from here. After you’re done installing the app on your PC or Mac, follow the steps below. (Although the screenshots  below show the Mac app, instructions for the Windows version should be fairly similar.)
step 1
Step 1: Open iPhone Configuration Utility and click on the “Configuration Profiles” label on the left.
Step 2: Click on “New” at the top and you’ll notice a new profile has been created with default values.
step 2
Step 3: Fill in the required fields for the profile. I named my profile “Speed dial,” enter “com.yourname.profile” as the identifier and, if you want, you can fill in a brief description that explains the purpose of this profile.
step 3Step 4: Now scroll to the bottom, click on Web Clips, and then hit “Configure.” You’ll see that there are a set of fields that you have to fill in values for.
Step 5: In Name, enter the name of the contact you’d like to call. In the URL field, enter “tel://” followed by the phone number. You can also choose the icon that will appear on your iPhone’s home screen for the shortcut. In my case, I chose a retro phone icon from here. Enable the “full screen” checkbox as well.
Step 6: Now connect your iPhone via your USB cable and wait for it to appear under devices at the left. Once it does, click on the “Configuration Profiles” tab on the right. If everything went right till now, you should see the configuration profile you created, along with an install button on the right.
step 4
Step 7: Click the install button and your iPhone should automatically get unlocked and prompt you with a screen that asks you for permission to install the profile. Once that’s done, you should see the icon along with the name you had entered.
step 5
Step 8: Tap on the icon and it should open a web view with an alert asking you to confirm whether you want to proceed with the call. Once you confirm, your call will be placed.
The flow would have been even better had Apple not put a confirmation alert every time you tap the web clip icon, but it still takes just two taps, where as the Phone app favorites could take two and at most three taps to end up at the calling screen. You can even use this trick to quickly message people, just enter “sms://” in the URL instead of “tel://”. When using the SMS url, iOS doesn’t even ask for a confirmation and directly redirects you to the compose window, making it a one-tap process.
If you have multiple iPhones, you can simply export the profile from iPhone Configuration Utility and mail it to all devices as an attachment, making this process work over-the-air without the need to be connected via USB.

Iphone Tips: How to check if your iPhone is Unlocked or Not

Having your iPhone locked to a carrier can be a pain if you need to switch SIMs. Especially while you’re travelling, and you try slipping in another SIM card only to find that you’re blocked from using it. Knowledge is power, and to be forewarned is to be forearmed. Here’s how to find out, in advance, if your iPhone is locked to your carrier or not.

The basic method

The easiest way is to get a spare SIM card, from a different network to your current provider, and try it in your phone. A few minutes after changing the SIM cards – you should reboot your iPhone to be sure – you will see the new network name in the status bar if your phone is unlocked. If your phone is locked, you’ll get a pop-up error asking you to insert a valid SIM card.
You should do this sooner rather than later if you will be travelling. You don’t want to be stuck in a foreign country and not be able to buy phone service!

The online method

If you can’t get hold of a spare SIM card and you need to know whether you’re locked or not, there’s a website that can help. IMEI.info can access a public database of IMEI codes which tracks which phones in the world are carrier locked or not. To use this service, you’ll need to obtain your iPhone’s IMEI code – which is a code that is unique to your device.
iphone-locked (1)
If you have a SIM card installed, and only if, you can see the IMEI code by dialing *#06#. You can also get the IMEI code via the Settings app by navigating to General > About and scrolling down.
Alternatively, you can plug your iPhone into your Mac or PC and start iTunes. On the device Summary screen, you’ll see a line showing your phone number (the line below the phone’s data capacity). Click on the phone number, which will reveal the IMEI code. The IMEI code is also engraved on the back case near the bottom in case of some iOS devices like the iPhone 5 and the original iPhone or engraved on the SIM card tray in case of the iPhone 3G, iPhone 3GS, iPhone 4 and iPhone 4S.
iphone-locked (4)
Once you have the IMEI code, return to IMEI.info and input the code. You’ll see a table of basic information about your model of phone. Some details may be incorrect. For example, it reported my 16GB iPhone 5 as having 32GB.
iphone-locked (3)
Notice on the right of the page a set of coloured boxes. The “SIMLock and Warranty” check in green is free, however you need to register an account at this stage. After you’ve registered and logged in to your account, click on the “SIMLock and Warranty” button. It will prompt you to spread the word. Click on Check Apple phone details button to continue.
It will take a few seconds to process your request and display if your phone is locked or unlocked (next to the SIM Lock field) as you can see in the screenshot below.
iphone-locked (2)

What to do if you are locked

You can contact your carrier, as in many countries they unlock the device for free or for a fee. In the U.S., carriers like AT&T have also made it easy to unlock off-contract iPhone. There are also many sources of information on the web about how to get your phone unlocked, and there are many websites which, for a fee, will provide an unlock code. The UK MVNO, GiffGaff, has an extensive information resource on this subject called Unlockapedia.

Iphone Tips: An exhaustive list of Keyboard Shortcuts for iPad and iPhone


ipad keyboard
Yesterday we told you about new keyboard shortcuts added in iOS 7, but iOS already supported a bunch of keyboard shortcuts that many people might not be aware of. So here’s an exhaustive list of keyboard shortcuts for iPhone and iPad that can be used with a Bluetooth wireless keyboard.
While keyboard shortcuts are hard to remember, they’re a great productivity boost once you get over the learning curve. So if you’re in a text editing application, you won’t have to take your hands off the keyboard each time you want to select text to copy and paste.
Since most of these shortcuts are largely undocumented, you can refer to this list to get started:
System Shortcuts
  • F1 Dim screen
  • F2 Brighten screen
  • F7 Back one song
  • F8 Play/pause
  • F9 Skip song
  • F10 Mute
  • F11 Decrease volume
  • F12 Increase volume
  • ⌘ Space Display a list of available languages; to choose one, tap the space bar again.
Text Selection and navigation
These shortcuts are the same as on any Mac, so you shouldn’t have any problem picking them up quickly on the iPad.
  • ⌘C Copy
  • ⌘X Cut
  • ⌘V Paste
  • ⌘Z Undo
  • ⌘⇧Z Redo
  • ⌘Delete to Delete the text to the beginning of the line
  • Control K to Delete the text to the end of the line
  • Alt (Option) Delete to Delete the word before the cursor
  • ⌘↑ Jump to top of document
  • ⌘↓ Jump to bottom of document
  • ⌘← Jump to beginning of line
  • ⌘→ Jump to end of line
  • Alt↑ Jump to previous start of line
  • Alt  ↓ Jump to next end of line
  • Alt  ← Jump to previous word
  • Alt  → Jump to next word
  • ↑ Select the text above
  • ↓ Select the text below
  • ← Select the text on the left
  • → Select the text on the right
  • ⇧⌘↑ Select all the text to the beginning of the document
  • ⇧⌘↓ Select all the text to the end of the document
  • ⇧⌘← Select the text to the beginning of the line
  • ⇧⌘→ Select the text to the end of the line
  • ⇧Alt↑ Select the text above, line by line
  • ⇧Alt↓ Select the text below, line by line
  • ⇧Alt← Select the text on the left, word by word
  • ⇧Alt→ Select the text on the right, word by word
iPad Navigation
While not normally enabled, iOS will also let you switch between apps and do a lot more if you enable VoiceOver. To switch it on, go to Settings > General > Accessibility > and turn on VoiceOver. Along with the shortcuts, this will also enable the actual voice over, but you can turn that off by pressing Control + Option + S.
  • Control Option H   Home button
  • Control Option H H   Show multitask bar
  • Control Option i   Item chooser
  • Escape   Back button
  •   next item
  •   previous item
  • ↑↓ simultaneously tap selected item
  • Option↓ scroll down
  • Option↑ scroll up
  • Option← or → scroll left or right
  • Control Option S turn VoiceOver speech on or off
  • Command Shift Tab switch to the previous app
  • Command Tab switch back to the original app
  • ←+→, then Option + ← or Option+→ navigate through Dock
Safari
  • ⌘L Open Location
  • ⌘T open a new tab
  • ⌘W close the current tab
  • ⌘R refresh the current tab
  • ⌘. stop loading the current tab
Mail
  • ⌘N create a new message
  • ⌘⇧D send a message
  • Backspace key to delete the currently selected message
  • ↑ or ↓ select suggested email address in To/CC/BCC popover fields
Pages
  • ⌘⇧K comment
  • ⌘⌥K show next comment
  • ⌘⌥⇧K show previous comment
The iOS 7 SDK lets developers add custom keyboard shortcuts in their apps for external Bluetooth keyboards. So expect your favorite iOS text editor to add support for this very soon.
Have we missed any other keyboard shortcuts for the iPhone or iPad in the list? Let us know in the comments below.

Iphone Tips:How to wipe all of your personal data off an iPad or iPhone

How to erase all of your personal data off an iPad or iPhone
If you're selling your iPhone or iPad or passing it on to someone else, the first thing you'll want to do is make sure they won't have access to any of your personal data. Fortunately, iOS makes it very easy to wipe all your data off your old iPhone or iPad, no computer required. Here's how:
Before doing this, you obviously want to make sure you either have an iCloud backup or an iTunes backup of your data. Otherwise, you won't be able to get your stuff back. Once you're sure you have a backup for your own use, proceed on.

Turn off Find My iPhone

If you're on iOS 7 already and you have an iCloud account linked to your iPhone or iPad, you'll need to sign out of Find My iPhone before you can truly wipe the device.
  1. Launch the Settings app from the Home screen of your iPhone or iPad.
  2. Scroll down and tap on iCloud.
  3. Scroll down once more and turn Off the Find My iPhone option.
  4. You will be prompted to enter your iCloud password. Once you're done entering your password, tap Turn Off.

That's it, you can now proceed to wiping your iPhone or iPad. The above steps are only necessary if the iPhone or iPad you're trying to restore is on iOS 7.0 or above.

Erase all data from your iPhone or iPad

  1. Launch the Settings app from the Home screen of your iPhone or iPad.
  2. Now tap on General.
  3. Scroll all the way to the bottom and tap on Reset.
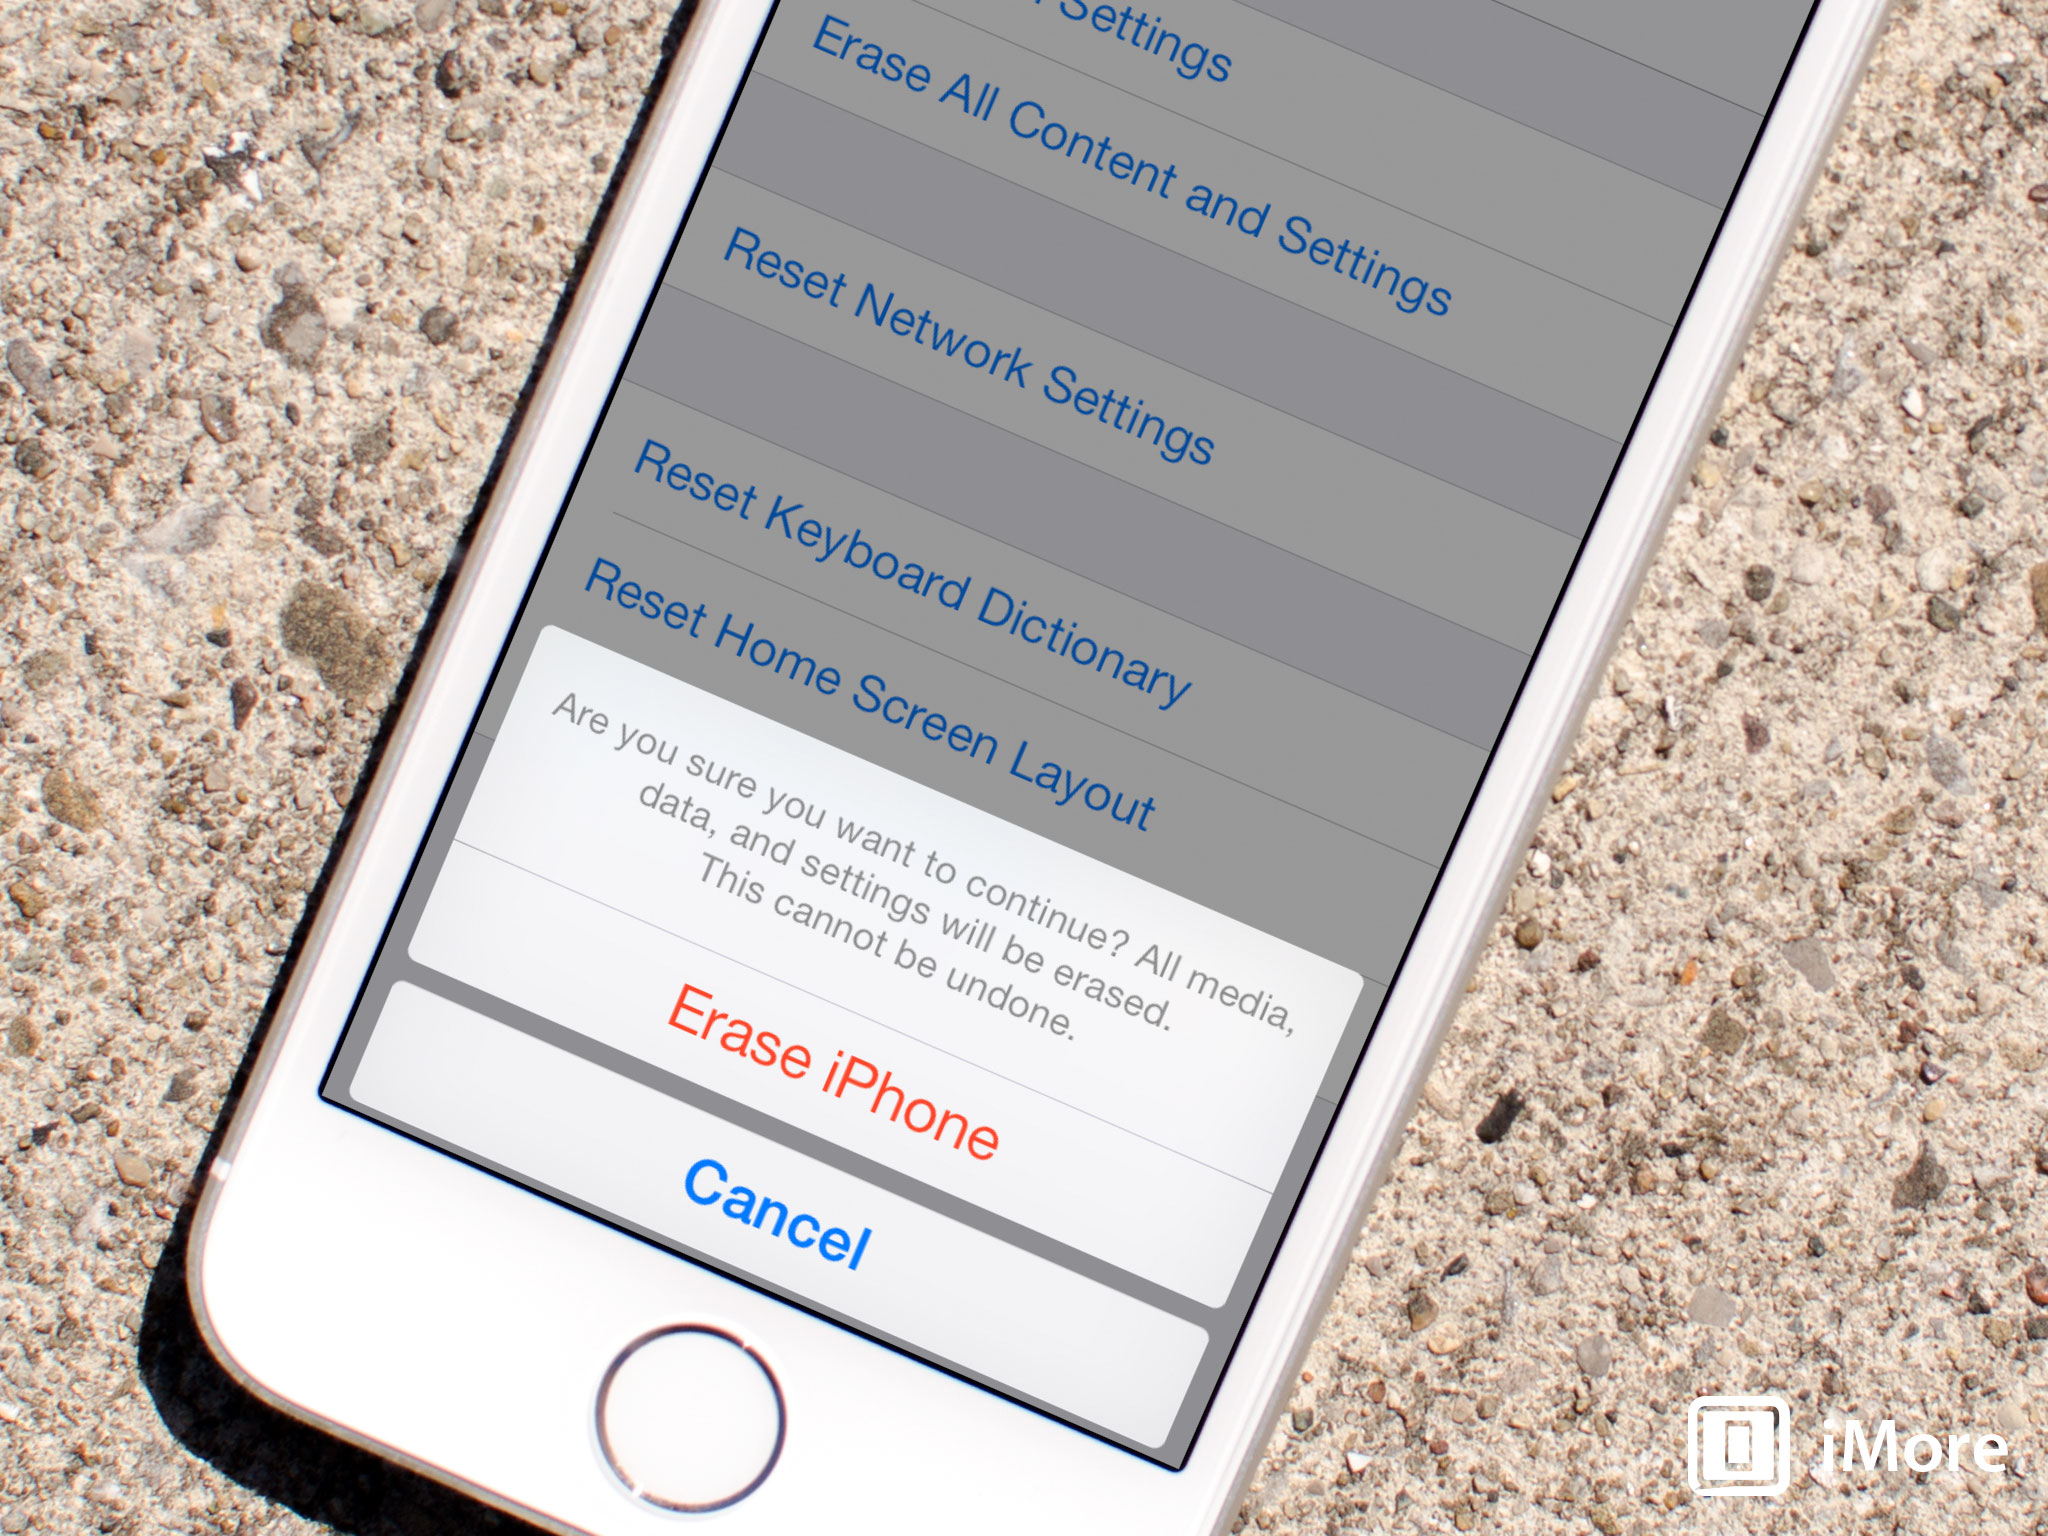
  4. Tap on Erase All Content and Settings.
  5. You will be prompted to confirm your selection, tap on Erase iPhone.
  6. Once more you will be reminded that you can't undo this action, tap Erase iPhone one more time to confirm.

That's it. Your iPhone or iPad will reboot after a few minutes and all your personal data should be gone and again look like the day you pulled it out of the box.

Wednesday, January 1, 2014

Jailbreak iPod Touch 5G, 4G iOS 6.1 / 6.0.1 / 6 with Evasi0n

Evasi0n, the untethered jailbreak for iPod Touch 5G/4G is out now! You can jailbreak iPod Touch 5G, iPod Touch 4G running iOS 6.1, 6.0.2, 6.0.1 and iOS 6 with Evasi0n. In this guide you’ll learn how to jailbreak iOS 6.1 on iPod Touch 5G/4G using Evasi0n untethered jailbreak. Steps are same for all other supported iOS firmwares and devices.
Hit the jump for detailed jailbreak instructions to jailbreak iPod Touch 4G/5G untethered on iOS 6.1 firmware…
jailbreak-ipod-touch-5g-4g-evasi0n
For iPhone: how to jailbreak iPhone 5, 4S, 4, 3GS iOS 6.1 with Evasi0n
For iPad mini: How to Jailbreak iPad mini iOS 6.1 with Evasi0n
For iPad: how to jailbreak iPad 4/3/2 iOS 6.1 with Evasi0n
IMPORTANT
Let’s jailbreak iPod Touch 4G, iPod Touch 5G iOS 6.1 with Evasi0n untethered jailbreak…

How to Jailbreak iPod Touch 5G / 4G iOS 6.1 with Evasi0n

NOTE: This guide applies to iOS 6.1, 6.0.2, 6.0.1, 6 firmware.

Step 1

First of all backup your personal data via iTunes or iCloud, disable lock passcode, and close iTunes /Xcode before proceeding.

Step 2

Make sure that your iPod Touch is running iOS 6-iOS 6.1. A clean/fresh restore is always recommended if you want to jailbreak your device. Here’s how to update to iOS 6.1.

Step 3

Assuming that your iPod Touch 5G or iPod Touch 4G is running iOS 6.1-iOS 6, let’s begin the jailbreaking process…
Download Evasi0n

Step 4 – Jailbreaking

Run the evasi0n and plug in your iPod Touch 5G/4G;
Evasi0n should detect your iPod Touch 5G / iPod Touch 4G and the jailbreak button will be highlighted;
Click the Jailbreak button to begin jailbreaking your iPod Touch 5G/4G;
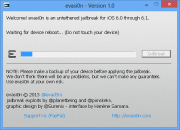
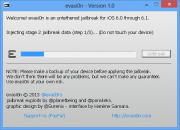
Evasi0n will perform several jailbreaking steps including preparing jailbreak data, injecting jailbreak data, and will reboot the device;
jailbreak ipod touch 5g 4g 6.1 evasi0n 1jailbreak ipod touch 5g 4g 6.1 evasi0n 2jailbreak ipod touch 5g 4g 6.1 evasi0n 3
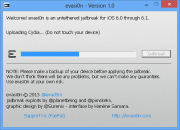
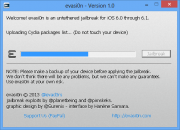
After reboot it will upload stage 2, uploading Cydia, and uploading the Cydia packages list. The jailbreak process may take a few minutes, so be patient.
jailbreak ipod touch 5g 4g 6.1 evasi0n 4jailbreak ipod touch 5g 4g 6.1 evasi0n 5jailbreak ipod touch 5g 4g 6.1 evasi0n 6
Once the above process is completed, evasi0n will ask you to unlock your device. Slide to unlock your device and locate a new icon called “jailbreak” on your iPod Touch’s home screen.
jailbreak ipod touch 5g 4g 6.1 evasi0n 7
Tap this Jailbreak app icon (just once), it will open up and close instatntly.
jailbreak ipod touch 5g 4g 6.1 evasi0n 8
Evasi0n will again process and show more message like injecting jb data messages, and Root Filesystem successfully remounted.
jailbreak ipod touch 5g 4g 6.1 evasi0n 9jailbreak ipod touch 5g 4g 6.1 evasi0n 10jailbreak ipod touch 5g 4g 6.1 evasi0n 11
Once the iPod Touch jailbreaking process is completed, a “Done!” message will appear on evasi0n tool. You can exit the evasi0n tool. Your device will now reboot. First time boot after jailbreak will take some time, so be patient.
An evasi0n logo will appear on your screen and several messages will appear on your iPod Touch’s screen. Once the process is completed, your iPod Touch 5G/4G will boot to lock screen. Unlock your device and find the sweet Cydia icon on your springboard.
jailbreak ipod touch 5g 4g 6.1 evasi0n 12
That’s it! you’ve succeesfully jailbroken iPod Touch 5G, iPod Touch 4G running iOS 6.1 – iOS6.

Troubleshooting

If the process gets stuck somewhere, it’s safe to restart the program, reboot the device (if necessary by holding down Hold and Home until it shuts down), and rerun the process.
If the device is stuck displaying “patching kernel”, you can press Power+Home for a long time to force a reboot.